The Ultimate Guide to Staining Hardwood: Techniques and Tips

Staining hardwood can transform your space, enhancing both beauty and durability. Whether you're a seasoned DIY enthusiast or a beginner, this guide will help you navigate the process step by step.
Understanding Hardwood Stains
Before you begin, it’s important to understand the different types of stains available:
- Oil-Based Stains: These penetrate deeply, providing a rich color. They take longer to dry, but they are durable.
- Water-Based Stains: These dry quickly and have less odor. They tend to raise the wood grain, requiring light sanding afterward.
- Gel Stains: Ideal for vertical surfaces, gel stains sit on top of the wood rather than soaking in, offering excellent control.
Choosing the right stain can make a big difference in the final look of your hardwood.
Preparing Your Wood
Preparation is key for a successful staining job. Here’s how to get started:
- Clean the Surface: Remove any dirt, grease, or previous finishes. A clean surface ensures even staining.
- Sand the Wood: Use a sanding block or power sander to smooth out the wood. Start with coarse grit and move to fine grit for a flawless finish.
- Test for Stain Absorption: Before applying stain to the entire area, test a small, inconspicuous spot to see how the wood absorbs the stain.
Applying the Stain
Now it’s time to get to the fun part—applying the stain!
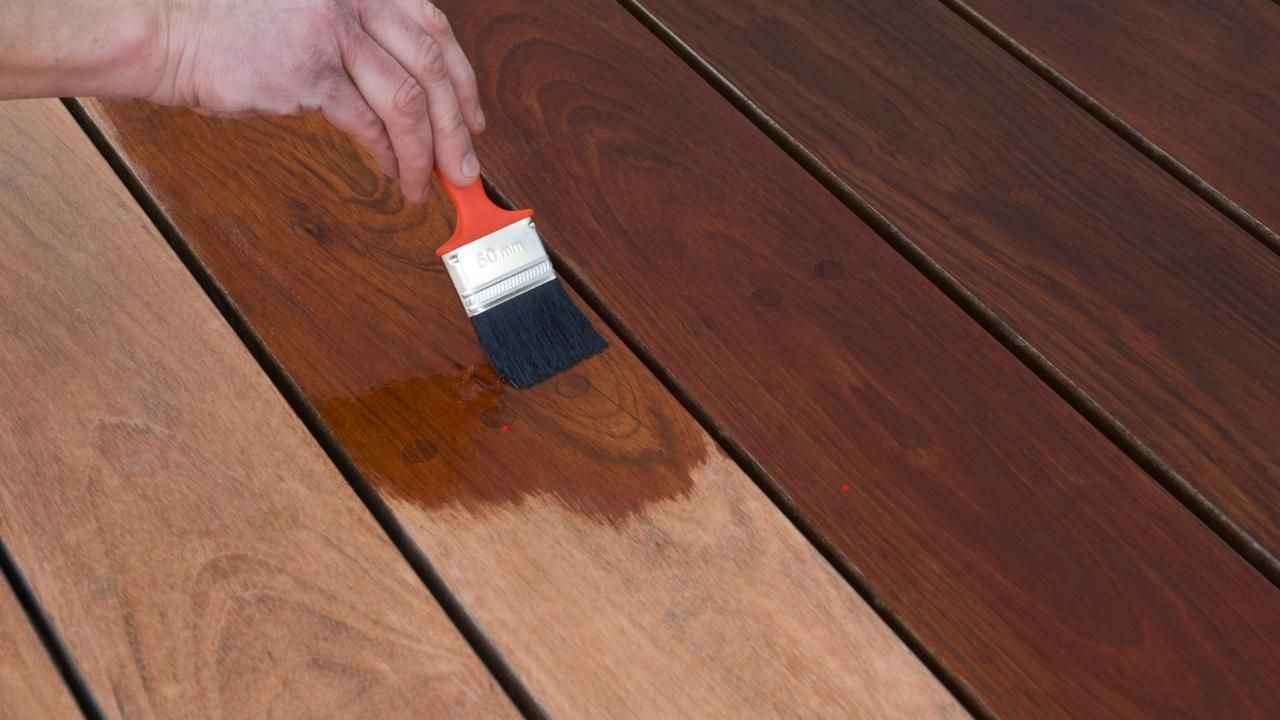
- Choose Your Tools: Use a foam brush, rag, or paintbrush, depending on your preference and the type of stain.
- Apply Evenly: Start in a corner and work your way across the floor. Apply the stain in long, even strokes, following the wood grain.
- Wipe Off Excess: After a few minutes, use a clean rag to wipe off any excess stain. This step is crucial for achieving a uniform look.
Finishing Touches
After the stain has dried (usually 24 hours), it’s time to finish the job:
- Seal the Surface: Use a clear coat, like polyurethane, to protect your stained wood. Water-based finishes dry quickly and are less smelly, while oil-based finishes offer durability.
- Sand Between Coats: If applying multiple coats of finish, lightly sand between each layer for better adhesion.
Maintenance Tips
To keep your stained hardwood looking its best:
- Regular Cleaning: Sweep or vacuum regularly to remove dirt and dust.
- Avoid Excess Moisture: Use damp cloths instead of soaking the floor to prevent damage.
- Use Rugs: Place rugs in high-traffic areas to reduce wear and tear.
When to Seek Professional Help
If the project feels overwhelming or if you're unsure about your staining skills, don’t hesitate to reach out to a commercial flooring contractor Portland ME for expert advice and services. They can provide expertise and tools to achieve a flawless finish.
Final Thoughts
Staining hardwood can breathe new life into your space. With the right preparation and techniques, you can achieve stunning results. Whether you tackle this project on your own or enlist the help of a hardwood flooring services Portland ME, you’ll be amazed at the transformation. Contact a local expert today or gather your materials and start creating a beautiful, refreshed look for your hardwood floors!
You might also like
Maine Hardwood Blog
SPEAK TO A TEAM MEMBER TODAY
76 William Street, Portland, Maine 04103, United States
Phone: (207) 632-2176
Email: vudung9987@gmail.com
Business Hours
- Mon - Fri
- -
- Sat - Sun
- Closed


